Pages

Tuesday, January 29, 2013

Glitter: The gift that keeps on giving!

The original title of this post was "Glitter is the Herpes of crafts," but I figured that might be offensive.  So I moved it to the first line in the post.  Much less offensive.  I read that quote somewhere and thought it was hilarious.  And true.  I love glitter.  Love crafting with it.  Love glitter decorations.  But once you have glittered, it seems you never get rid of the tiny sparkles.  And It.Gets. Everywhere.  There is glitter on the tables, glitter in your hair, glitter on your skin and clothes.  But then, I think that life is better when it is sparkly. So sparkle on!

Today's Thrills Thrifty Craft involves glitter and clothespins and Mod Podge.


That's It! And you get some cute clothespins to use for anything you need.  I put a layer of Mod Podge on the clothespin, poured the glitter over the clothespin (while holding it over a bowl to collect the extra) then set aside to let dry.  Once dry, I used a paint brush to put a layer of Mod Podge on top of the glitter and let dry. The top layer of Mod Podge really sets the glitter so that it isn't sprinkling everywhere. 


I think the clothespins were a dollar for 25 or 50 at walmart.  I already had Mod Podge and glitter. 
I really love using them and they really sparkle!  I made some pink ones for a baby shower and used them to hang letters on twine for a banner.

I made some red ones and hung our Christmas cards on some twine as a cute and easy display.  You could glue a small magnet on the back for even MORE functionality.  I still plan on posting about rosettes this week, so come back!

Stay crafty, my friends!

Friday, January 25, 2013

Talkin' Chalk

Chalkboards, that is.  I am sort of obsessed with chalkboards and chalkboard paint.  I wanted to share some of the chalkboards I have made recently.  They are sooooo easy! You should make one, too! Or, you could become like me and be so obsessed that you make 10 and then have no place for them!  On second thought, don't be like me.

Many moons ago, I was bored on a Saturday and decided I wanted to get out and go to some garage sales.  I was very unfamiliar with the area and I ended up getting lost.  I made some turns, and then some more turns, and then a few more turns and I stumbled upon a neighborhood wide garage sale. I have seldom before or since had such a successful garage sale day.  It was epic.  It was magical.  I get a little misty-eyed when I think about it.  I only made a few stops before I had a full car and an empty wallet.  I refer to it as the Bermuda Triangle of garage sale neighborhoods because I found it by accident and I haven't been able to find it since! When I left the last sale, I turned a corner and it's like it vanished from the face of the earth, never to be seen again.  Sort of like the lost city of Atlantis, if Atlantis was a cool bohemian neighborhood full of hippies and TCU students.

It was at one of these garage sales that I bought a big wooden tray.  I had been hankerin' to make a chalkboard for some time and when I saw this little beauty out of the corner of my eye I knew,  KNEW,  I had to have it.  It was my last stop of the day and I literally had 3 dollars.  This is when going to garage sales late comes in handy.  The late hour, combined with the Texas heat were wearing on the sweet people hosting the sale and they let me purchase the tray and a mirror for much much less than they had them priced.  God bless them.  OK- so here is a pic of the tray before and after:

Before


After
Used as a sign at the baby shower I co-hosted for my sister-in-law.
The second chalkboard I made from a piece of sheet metal that I got from a different yard sale for 1 dollar.  It already had holes for hanging! Sorry but I don't have a before picture. With both the wooden tray and the metal, I spray painted the surface with Krylon paint in Watermelon Gloss.  With the metal, I used a primer prior to the first coat of spray paint.  I wish I could say that I taped off the part that was going to be my chalkboard surface to ensure a perfect paint job, but I did not.  I just bought some chalkboard paint from Hobby Lobby with a 40% off coupon (Woohoo!) and followed the directions.  When I got to the edges I just painted reeeeeaaaaallllyyy carefully.  
Made from sheet metal.

The last chalkboard project that I made recently involved two heavy-duty metal trays that I bought at a.... well, you know where I bought them.  They were $1.50 each.  I primed them with primer, which is a very important step when spray painting on metal.  It helps the paint adhere and not scratch off so easily.  You can get a spray paint primer at Wally World or Lowe's. I used Rustoleum Flat Primer.  After priming, I spray painted them with Krylon paint in Cherry Gloss.  I then used my chalkboard craft paint and painted the inside of the tray.  I gave one to my sister-in-law for Christmas(she asked for one specifically, I wasn't being cheap I promise) and I kept one.  I like these because of their size, which allow them to be placed almost anywhere and their cheery color!

 
Thanks for stopping by! Next week I plan on posting about some easy peasy fabric rosettes.  Stay crafty, my friends!


Wednesday, January 23, 2013

Thrill's Thrifty Craft: Valentine's Day Craft

Ah, Valentine's Day.  How I love thee.  And I do really love Valentine's Day.  I have ever since I was a little girl sitting in class diligently decorating a shoe box that would later collect class Valentines.  I remember on one particular Valentine's Day, it was a few hours before our class party and I was feeling extra special because mom sent a fruit roll up in my lunch that day.  Score! I saved it for last and ate it right before lunch ended.  As I walked back to class, there was a pep in my step and I was so excited as I thought of the party that was to come.  But, as I walked, I felt a little rumbly in my tumbly and  I started to feel a little queasy. By the time I got to class I had that feeling.  You know the one.  The feeling that says you are about to upchuck.  But, my teacher was nowhere to be found.  Being the strict rule follower I was, I was afraid to leave class without permission.  So I stood in the doorway, my eyes searching the small hallway for my teacher while simultaneously taking small breaths and trying not to ralph in front of the entire class.  When she finally arrived I said "Miss Chris, I think I'm gonna be...." And then I ralphed in front of the entire class!  I ended up going home.  I still remember trying to talk my mom into letting me stay at school.  But, alas, she brought me home where I sat by a trash can and mourned the fact that I was missing the party and the chance to get hopped up on sugar and run around like a crazy person with my friends.  I didn't eat another fruit roll up for years.

I kind of forgot why I was telling you that story. Oh, well. 

So, as I was saying, I LOVE VALENTINE'S DAY! I love all the red and pink displays, the chocolate, I love the little frilly paper doilies, the chocolate, the cheesy little cards that kids pass to one another, the chocolate, dumb romantic movies, the chocolate... MMM CHOCOLATE.....

Sorry, I got a little sidetracked.  Back to crafty goodness.  As promised on my last post, a Valentine's Day craft!


It is cute and very simple.  This craft can be done with materials you have around the house.  You will need:


Wax Paper
Crayons-- I used cheapo ones from Walmart
Big pencil sharpener or crayon sharpener-- Again, I got one for a dollar at Walmart ** You could also use a cheese grater
Iron
Craft Paper or paper towels- to protect the surface and the iron.


I first got the idea from Martha Stewart's website.  You can check it out, here.   I followed the tutorial and everything came out perfect! I will say that the crayons kept breaking off into the sharpener and so I had to use something to dig out the small broken pieces.  Other than that, easy peasy.

I made these about 3 years ago and I have pulled them out as a part of my Valentine's day decor ever since.  They look great in the window because they are sort of translucent. 
 
Here is what they look like in the window- pay no attention to the mess on the patio!

I used string to hang them, but I think ribbon (thin) would be pretty.  I didn't hang mine from a dowel rod, as suggested. I hang them individually (usually from the ceiling with tacks) and store them in a large envelope the rest of the year.

This is where I have them hanging now.
Just a little touch of Valentine's Day!

There you have it, folks.  A cheap and easy craft.  I plan on posting one more craft this week, so come on back! Stay crafty, my friends!


Monday, January 21, 2013

Being thrifty is nifty!

 Hi, there!  My name is Jill.  Some things you need to know about me:

1. In college I was given the nickname of Jill the Thrill from Stephenville which was usually   shortened to Jill the Thrill or just Thrill...And although I don't get called that too often anymore, I decided to call my blog Thrill's Thrifty Finds because, well, naming a blog is hard!

2.  I live in Fort Worth with my husband, Adam (sometimes referred to as the Hubster) and our dog, Daisy.

3.  I enjoy being thrifty.  And crafty.  In a word, I'm crifty... thrafty...?

I'll keep working on that one.  I enjoy being frugal (nicest word for cheap I can think of) and finding the BEST possible deals on things while still enjoying life and understanding that sometimes you need to splurge!  I love to craft but crafting takes money, honey! So, I try to craft as cheaply as possible.  I also dress, decorate my home, and live as cheaply as possible.  Adam really appreciates this.

While I enjoy a good thrift store or flea market, my main mode of cheaping out is garage sales.  I like to think they cut out the middle man so you really get the best deal.  I have heard so many people say they can never find anything good at garage sales.  I can see where they are coming from.  Garage sales can be tricky.  There are many times I can go an entire day and not find anything. And then the next Saturday I score at every sale.  I am not the type of garage saler (made up word alert) that gets up at seven and hits them when they all open.  Though from having my own sales I know this is when some great stuff gets bought.  I tend to get out and go around 10 or 11.  I have had some of my best luck at the end of the day when people are just ready to be done and are faced with selling their stuff for cheap or hauling it all back in their house and finding a place to store it all.  I can't tell you the number of times someone has basically given me something just to take it off their hands.

What I would ultimately like for this blog to be about is trying new crafts, cheap decor ideas and ways to be thrifty.  So, without further ado I wanna jump right into a recent craft I tried.  It involves toilet paper rolls!

Before you think I am crazy I want you to look at some of the ideas out there! I have seen so many great project ideas on different blogs and on Pinterest.

You can check out this cool wreath by Heidi at Mom's Crafty Space! Or this fall garland made from wee t.p. pumpkins, and finally, I really like this wall art from All Things Paper.

Now that you have an idea of what one can create from a toilet paper roll (and hopefully no longer think I am nutso), I wanted to share my idea for an initial made out of toilet paper rolls. My husband and I were married last year and I have really been enjoying projects that include my new-ish last name. On a later blog post I will talk about the SMITH wall hanging which I re-purposed from a sign I got at a garage sale for a dollar.

OK- So my mission is to make the letter S out of toilet paper rolls. I really liked the flower designs I have seen on some of the toilet paper roll wreaths on other blogs and decided to use that design to construct my letter! Although I am doing an S, I think any letter would be doable. ** You may find, as I did, that you will need to use some strategery (technical term alert) when hanging your letter-- I used thumbtacks to hang my S and shape it the way I wanted- but more on that later.

Materials Needed:
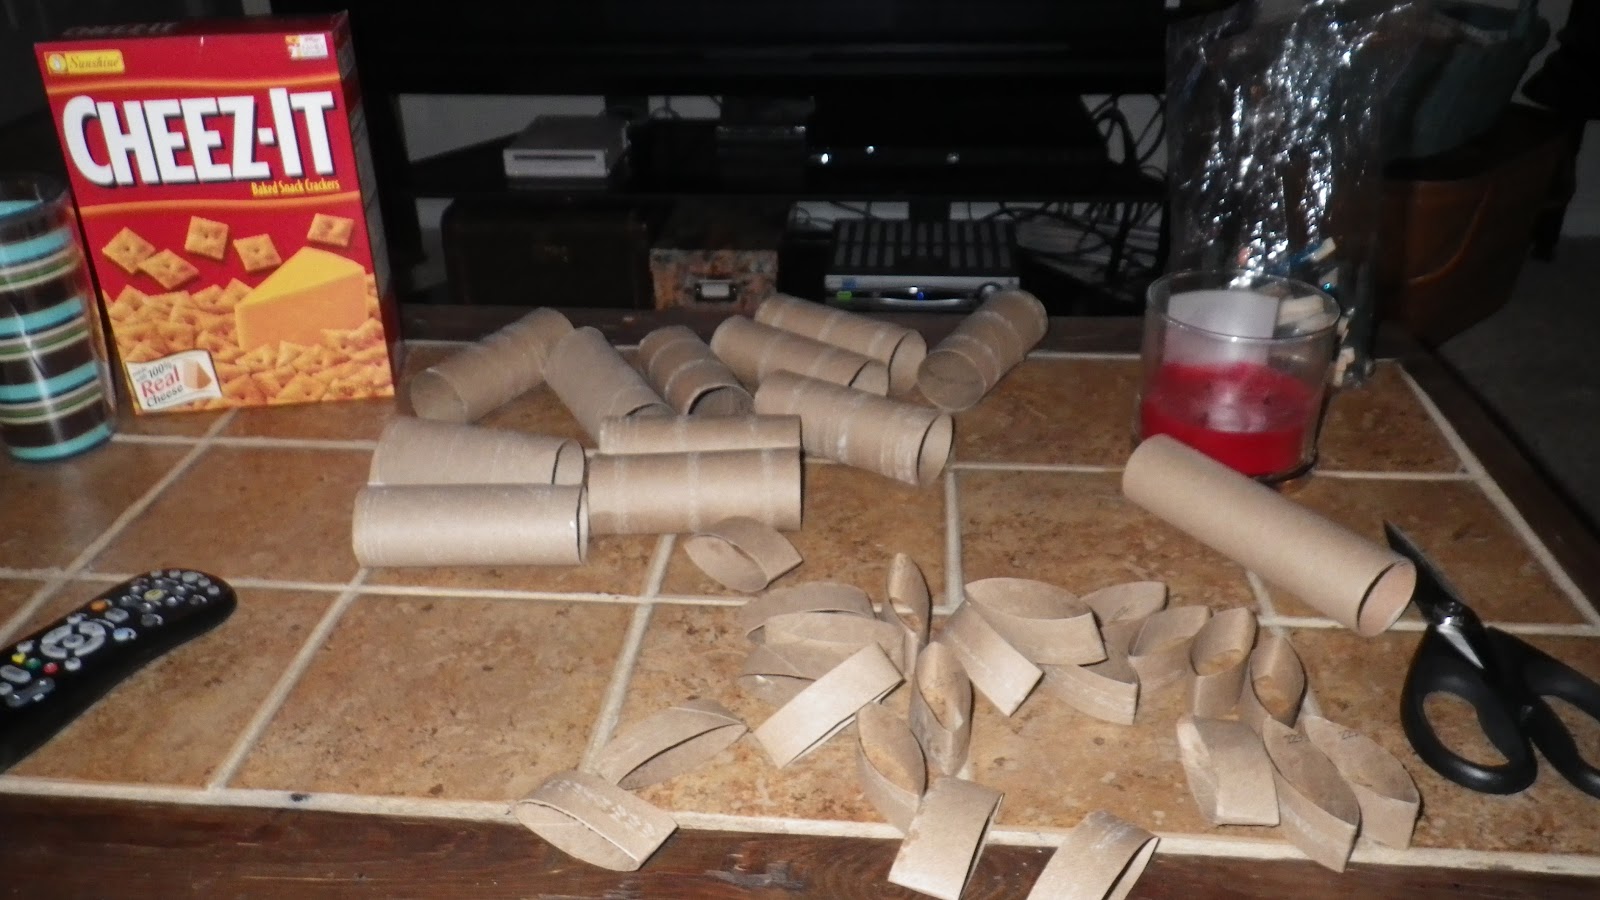
Several empty t.p. or paper towel rolls (I think my projects needed 12 or 13 t.p. rolls)
Scissors
Aleen's Tacky Glue- Hot glue would work too, but me and hot glue don't exactly get along.
Paint color of your choice (I used American Acrylic Paint in Bluegrass Green- purchased at Hobby Lobby with a 40% off coupon) ** I was originally going to spray paint, but I decided to use acrylic paint instead. Spray paint may work better and would DEFINITELY be faster!
Small paint brush
Extra doo dads for embellishment-- (Optional based on preference) I bought some pearl stick-on Gemstones by the PaperStudio from Hobby Lobby when they were half off!!
Clothespins to help hold the pieces together while the glue dries. (You could make due without these, but they helped!)

The total for this craft for me was about 3 dollars since I had most of the things on hand. I spent about 2 dollars for the embellishments and 80 cents for paint.

Gather your materials.


Smash the rolls so that they lay flat. Well, flat-ish.


**While smashing, I like to say things like, "Hulk Smash" and pretend to have super human strength like The Incredible Hulk... But this is totally optional.

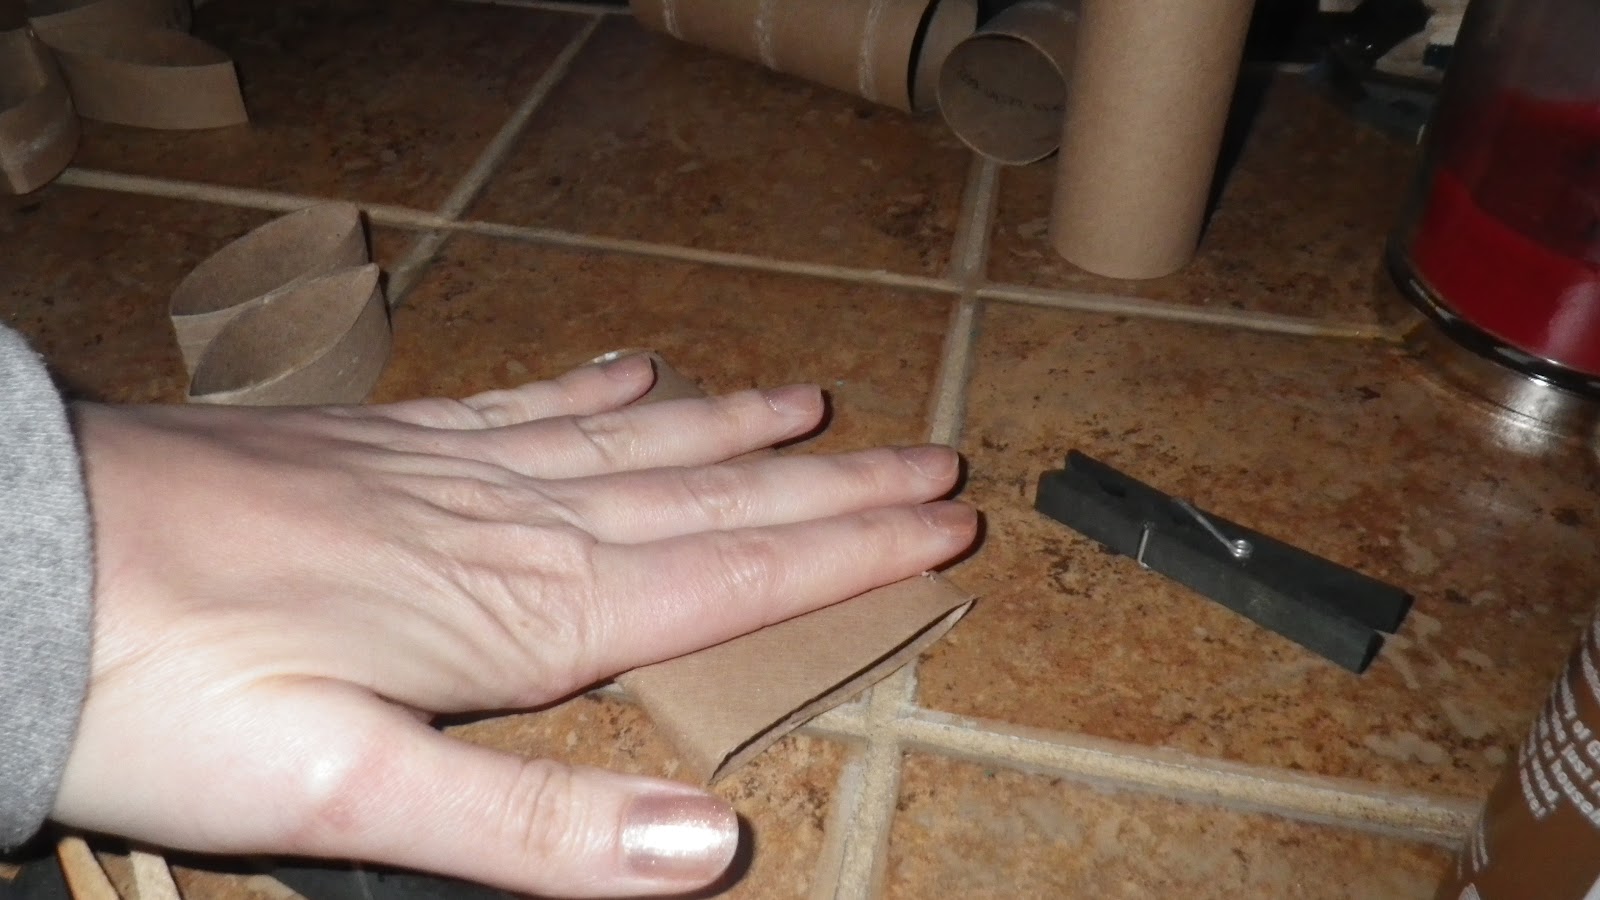
Cut your rolls to the desired thickness- I cut the t.p. rolls 5 times. I didn't measure to make sure they were all uniform, because that's not how this lazy crafter rolls (no pun intended). But, you are more than welcome to do so!


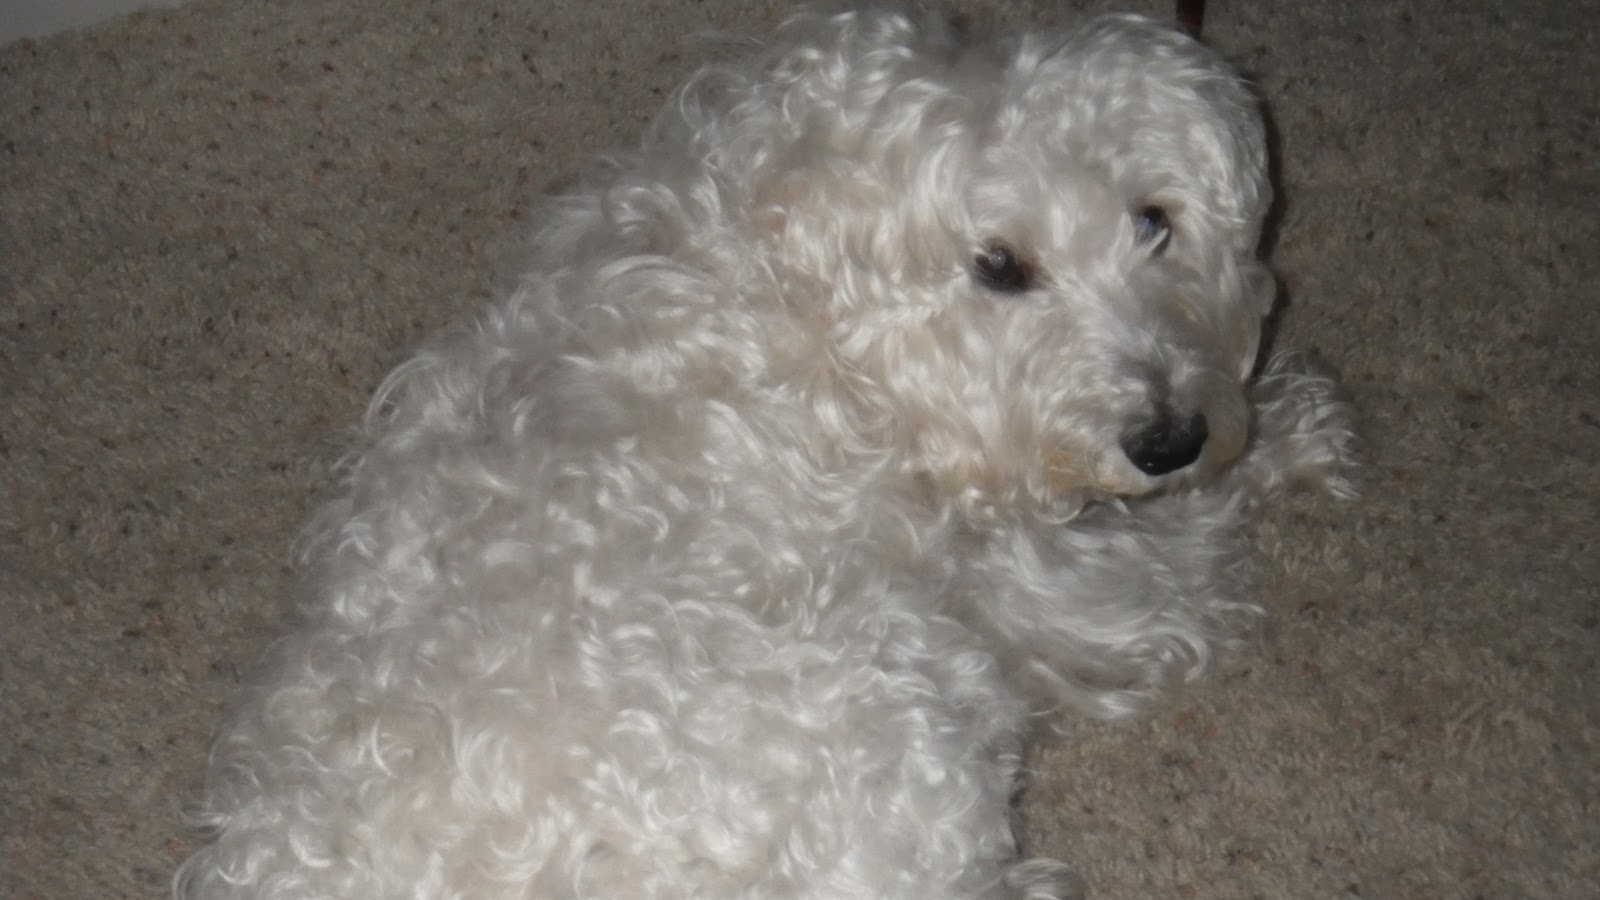
**Your hand may hurt after a while, I know mine did. I took a break and took out The Daisela (blog mascot). And maybe I ate some Cheez-Its (official unofficial sponsor of Thrill's Thrifty Finds).


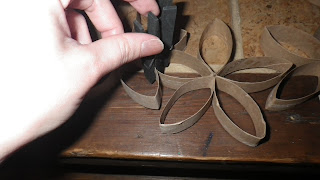
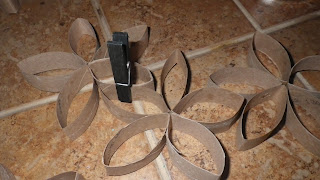
Once you have all of your rolls cut, get your tacky glue and glue the pieces together like they are flowers- I did five "petals" to make one flower.

See all the pretty little flowers?
.

Use the clothespins to clip the pieces together while drying when needed. The good thing about the Tacky Glue is that it holds the pieces together without much help! I like to pin them just to be on the safe side. Once your flowers are glued, start gluing them to each other in the design you want. Play with the pieces first to see which arrangement works best.


Playing with the design...

Once it is all dry, start painting!


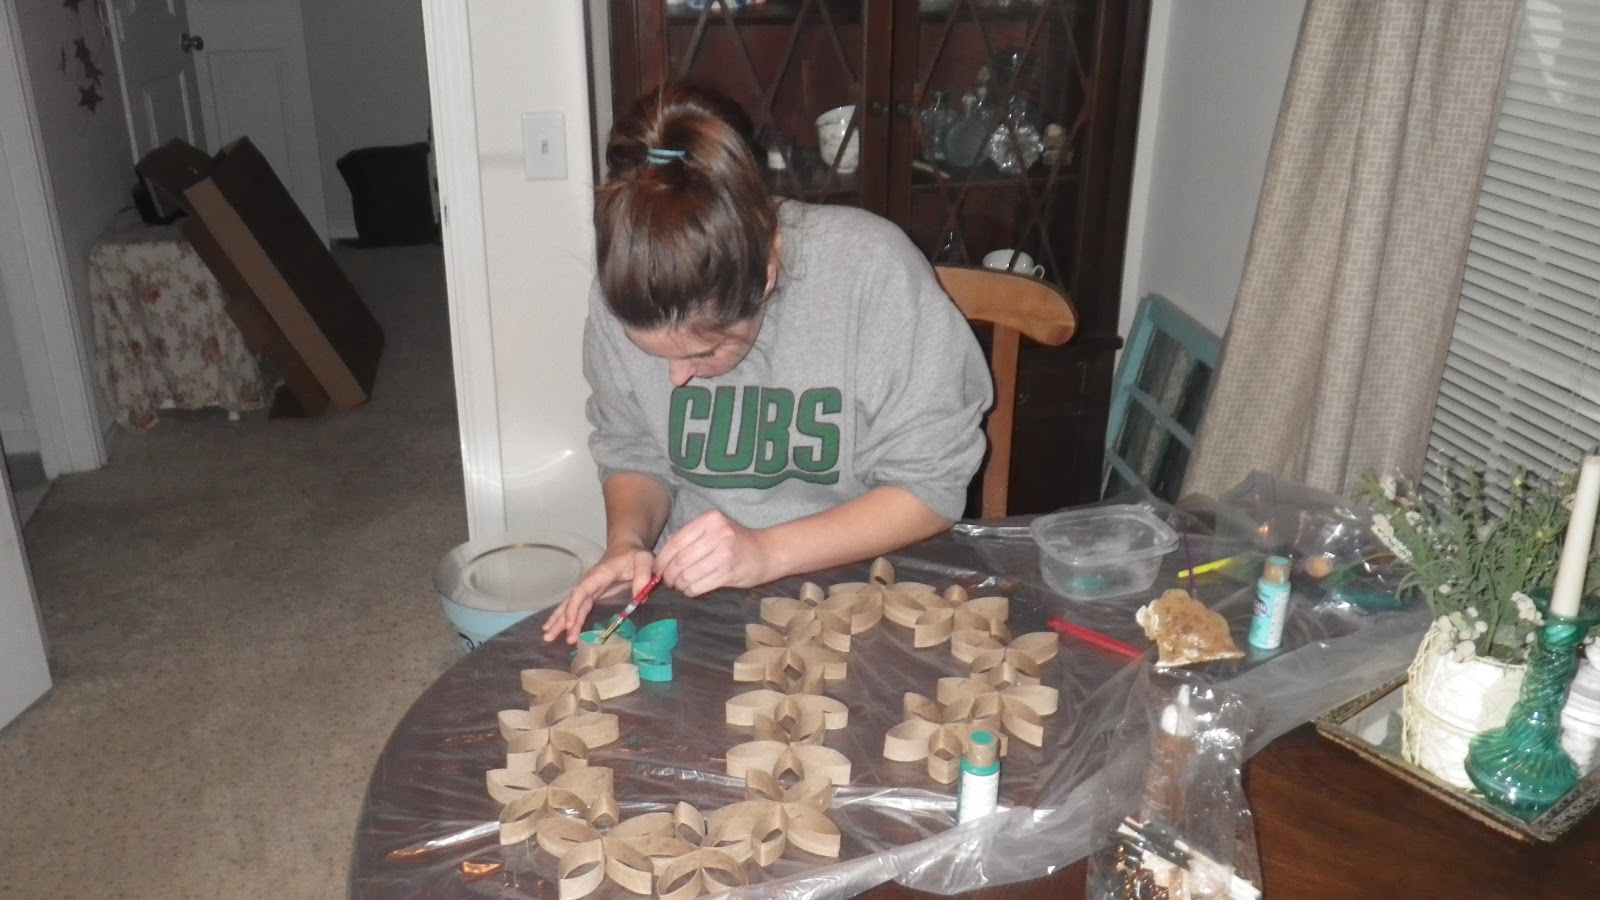
I asked the Hubster to take a picture of me painting so you could have an action shot. Pay no attention to the mess in the other room. P.S.- Check out my Clifton Cubs Sweatshirt!!
Just keep painting. Just keep painting. Just keep painting, painting, painting. If you do it my way (with acrylic paint) getting all the nooks and crannies can take some time. I only did one coat and left some spots for the natural color to show through. You know, to give it a distressed look. OK, fine! I didn't feel like doing another coat. It was by coincidence that it ended up giving a distressed look to the completed project. After the paint was dry, I stuck on the pearl embellishments in the center of each flower.

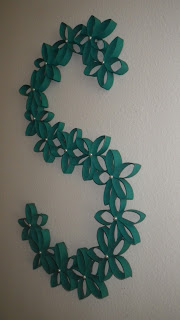
So here is the finished product!


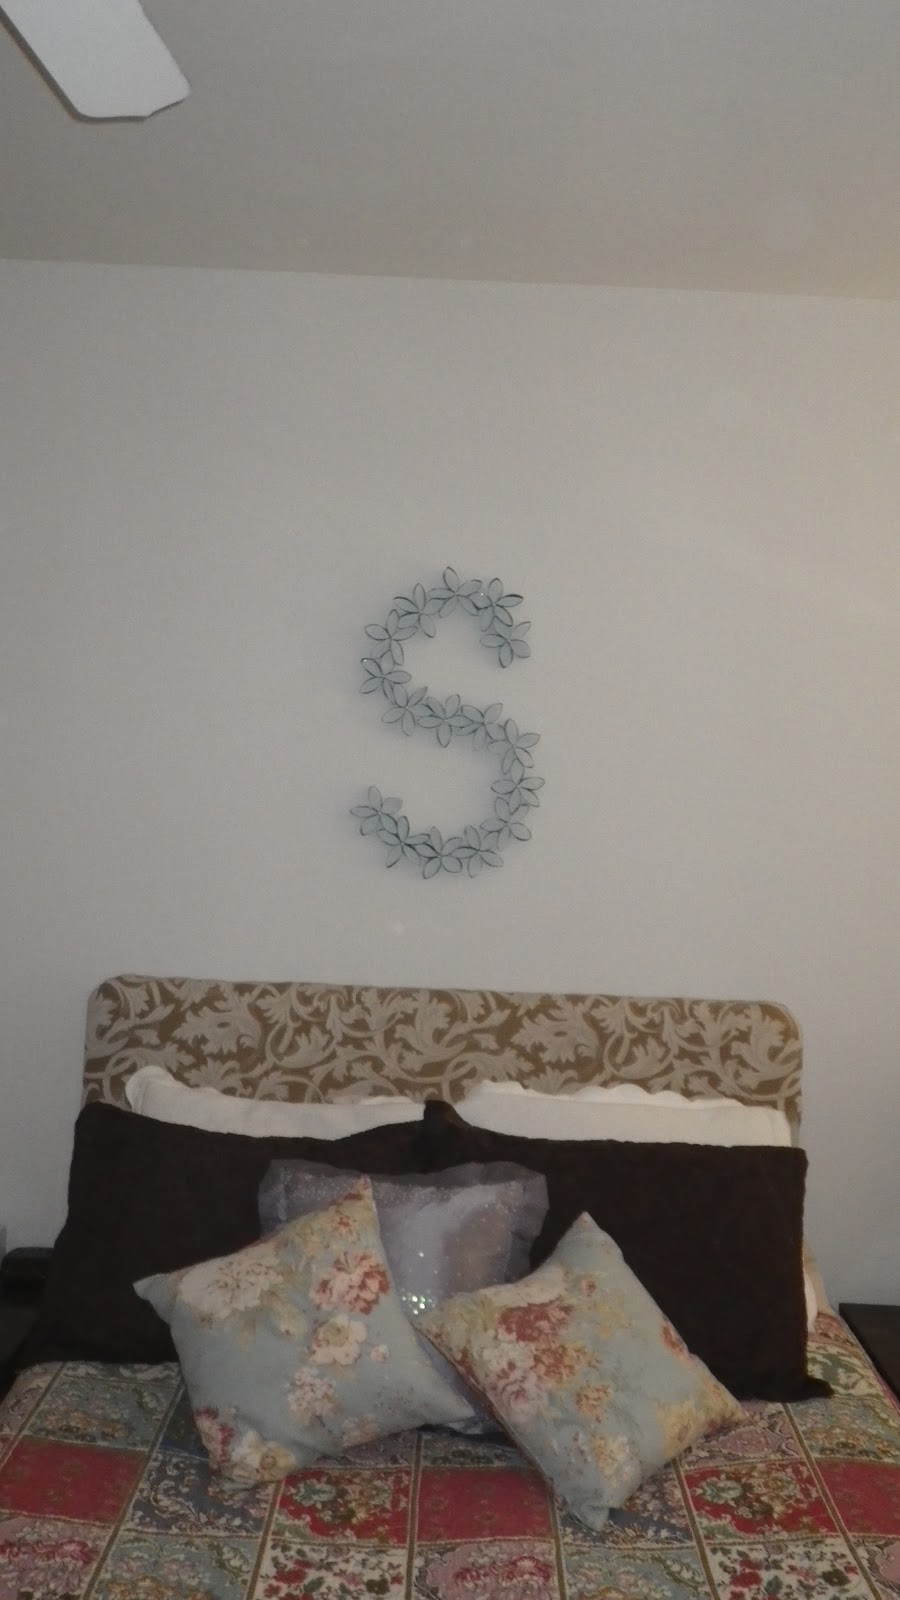
Really this craft could be called "T.P flower garland" since the S ended up being just several flowers glued together. But with the help of some well placed tacks I was able to hang it above our bed. You can sort of see the pearl embellishments in the picture. You see them better in person. Initially, I didn't use glue to adhere the pearls since they were self-adhesive, but after waking up with one stuck to my head (that had fallen off) I decided maybe glue is a good idea. So I took it down and used a paint brush to add a little glue to each pearl. 


So there you have it, folks.  Toilet paper roll wall decor.  I have seen where this is a good craft to do with kids (after you cut the rolls) since they can make their own design and it costs next to nothing!  I bet you will never look at a toilet paper roll the same way again.  Come back tomorrow because I plan to post a valentine craft that I got from Martha Stewart herself! Stay crafty, my friends!