Thursday, March 21, 2013
Hello Again!
I am back and have a new site! It is thriftybyjill.com. Please go there and see my newest post!
Sunday, February 24, 2013
I got a little too big for my britches
I just wanted to post a quick something to let the few people who read this (shout out to my relatives :)) that I have recently chosen to start a .com type of website. I am learning all about it and it is taking me some time considering I am a dipstick when it comes to computers. But, when I have learned all I can learn and actually post something (in the next week, hopefully) I will link to this blog and let everyone know!
I am currently learning about Cpanels and Child themes and Plug-Ins while Adam is making me watch a documentary on The Eagles. He is so old... :)
I am currently learning about Cpanels and Child themes and Plug-Ins while Adam is making me watch a documentary on The Eagles. He is so old... :)
Wednesday, February 13, 2013
Rosettes are red, well mine are pink...
So... last time I mentioned that I went a little crazy with the fabric rosettes that I made. Today's post is further proof. A while ago my bff sent me a picture of a valentine craft. It looked something like this:

And I decided to try it with the supplies I had on hand, with some tweaking. I recently scored with some awesome shadow boxes that I got for 80% off at Michael's. I bought four!
When my CPA husband (who puts EVERYTHING we purchase in categories for budgeting reasons) wanted clarification on the receipt so he could decide into which category the shadow boxes should be placed, the conversation went something like this:
Adam: "Hey, Jill, what are these things on the Michael's receipt?"
Me: "They are shadow boxes."
Adam: "And what are those?"
Me: "They are cool boxes you put stuff in and hang on the wall."
Adam:"Why do we now have four?"
Me: "Because they will make good gifts."
Adam: "For who?"
Me: "I don't know yet. I could also use them in crafts. They were on sale!"
Adam: "But you bought four of them."
Me: "I know. But think of the possibilities. I want to put our own wedding stuff in one and I think it would be cool to do that for another couple when they get married as a wedding gift. Or I have seen where couples keep their ticket stubs from movies and plays throughout their relationship and put them in a shadow box to hang on the wall as sentimental art. Or I have seen where people put the outfit they brought their baby home in and the little bracelet the baby wears at the hospital in one. The possibilities are endless! Plus they were on sale!"
Adam: "But you bought four."
Me:"I know. Did I mention they were on sale?"
Adam (with a long suffering sigh): "I'm just going to mark them as supplies."
Conversations like that happen a lot in our home.
Anyway, back to the craft for today.
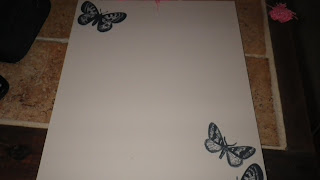
This was the original background of the shadow box. While I like it, it didn't fit with what I wanted so I covered it with pink sticky backed paper and covered that with natural burlap and hot glued the edges so it would lay nice and flat.


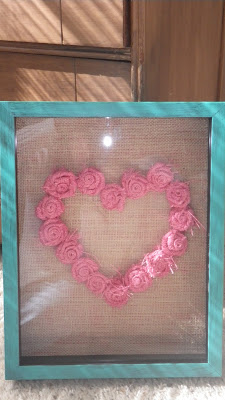
This is the original black metal frame. I painted it with some acrylic paint and sprayed a clear coat protector (after covering the glass with tape and newspaper).

Here is the finished product!

And I decided to try it with the supplies I had on hand, with some tweaking. I recently scored with some awesome shadow boxes that I got for 80% off at Michael's. I bought four!
When my CPA husband (who puts EVERYTHING we purchase in categories for budgeting reasons) wanted clarification on the receipt so he could decide into which category the shadow boxes should be placed, the conversation went something like this:
Adam: "Hey, Jill, what are these things on the Michael's receipt?"
Me: "They are shadow boxes."
Adam: "And what are those?"
Me: "They are cool boxes you put stuff in and hang on the wall."
Adam:"Why do we now have four?"
Me: "Because they will make good gifts."
Adam: "For who?"
Me: "I don't know yet. I could also use them in crafts. They were on sale!"
Adam: "But you bought four of them."
Me: "I know. But think of the possibilities. I want to put our own wedding stuff in one and I think it would be cool to do that for another couple when they get married as a wedding gift. Or I have seen where couples keep their ticket stubs from movies and plays throughout their relationship and put them in a shadow box to hang on the wall as sentimental art. Or I have seen where people put the outfit they brought their baby home in and the little bracelet the baby wears at the hospital in one. The possibilities are endless! Plus they were on sale!"
Adam: "But you bought four."
Me:"I know. Did I mention they were on sale?"
Adam (with a long suffering sigh): "I'm just going to mark them as supplies."
Conversations like that happen a lot in our home.
Anyway, back to the craft for today.

This was the original background of the shadow box. While I like it, it didn't fit with what I wanted so I covered it with pink sticky backed paper and covered that with natural burlap and hot glued the edges so it would lay nice and flat.

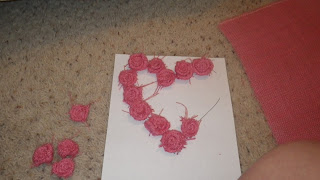
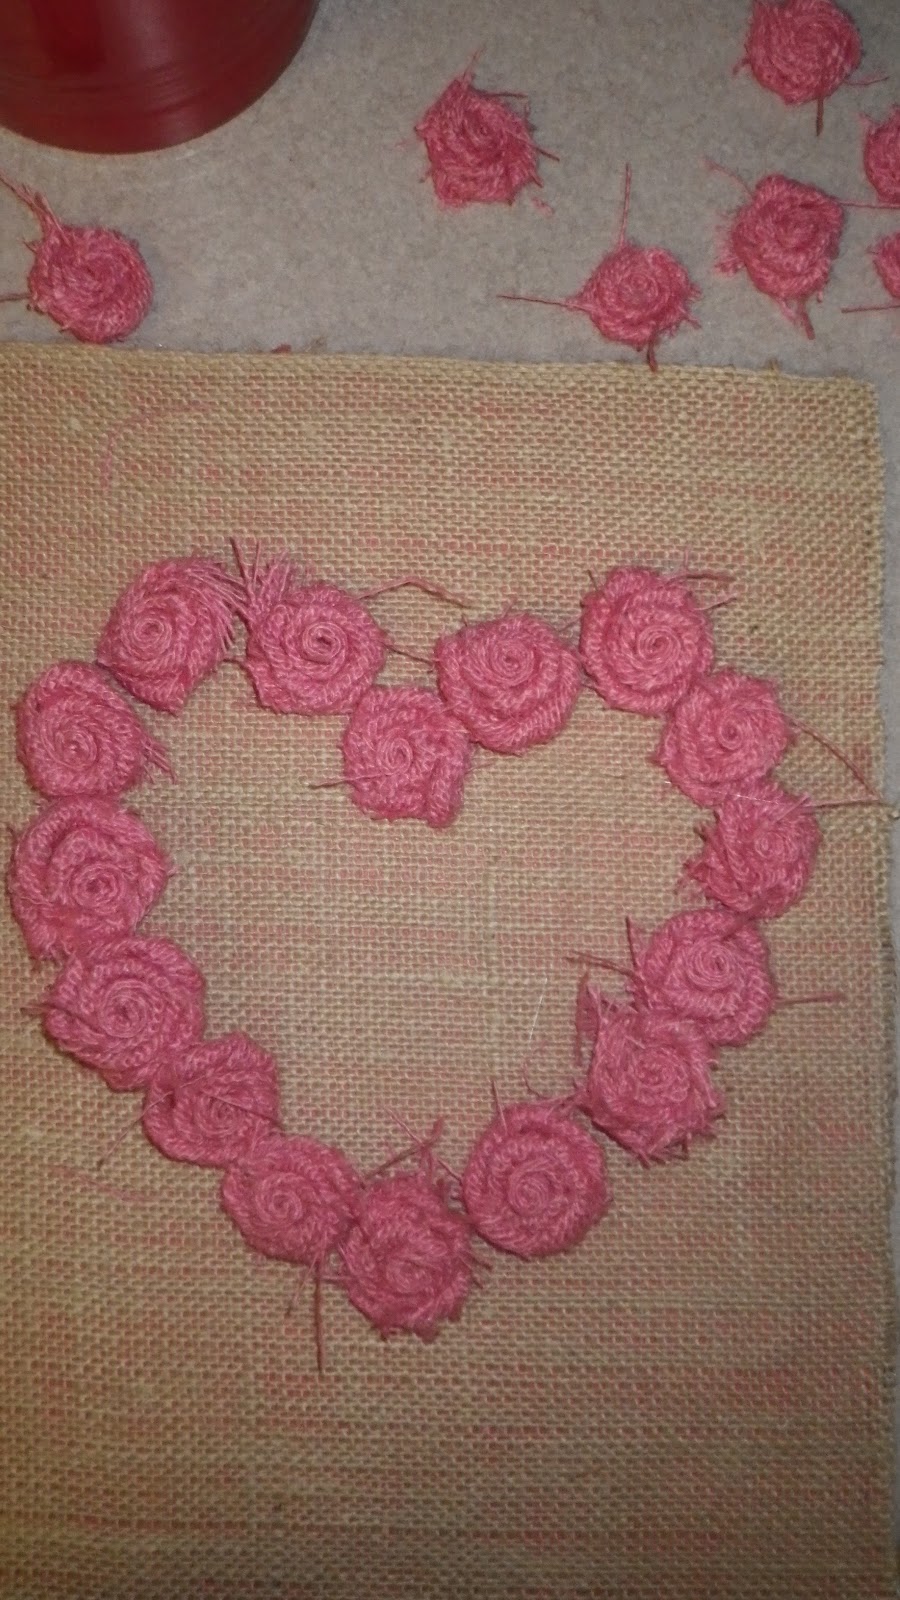
I printed out a heart on the computer and started making tiny rosettes using the method from the previous post . I decided to only do an outline instead of filling the heart. I liked it better.
I traced the heart with chalk onto the background and positioned the rosettes on the outline. I played with it some to make sure the spacing was right. Once satisfied, I glued those suckers down!
I traced the heart with chalk onto the background and positioned the rosettes on the outline. I played with it some to make sure the spacing was right. Once satisfied, I glued those suckers down!


This is the original black metal frame. I painted it with some acrylic paint and sprayed a clear coat protector (after covering the glass with tape and newspaper).

Here is the finished product!

 |
| Here it is with some ticket stubs. I think it looks cute! |
The total cost for this craft was around 5 dollars since the box was so cheap!
Stay crafty, my friends!
Sunday, February 3, 2013
Flower Power!
So, let's talk flowers. Well, fabric rosettes, to be exact. I came across a great tutorial from Freckled Laundry while web surfing. You can check it out, here!.
I will warn you, once you make one you will be addicted. They are just too easy and pretty! And cheap! Plus, there is so much you can do with them.
Materials:
Choice of fabric
Choice of glue-- I used hot glue (even though we don't get along)
Felt (optional)
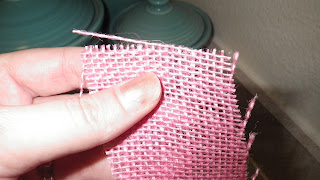
Get your fabric and cut a strip 1 inch wide by 24 inches long. After you make one you can adjust the length and width of fabric to your liking. Most of my strips are about 27 inches-ish. I say ish because I don't really measure things. No self respecting lazy crafter does! In the pictures I am using some pink burlap I bought at Hobby Lobby with a 40% off coupon (Woohoo!).
Fold the end of your strip in half and then fold it in half again.
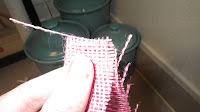
Roll the end into the fabric a few times.
Tack it down with a spot of glue.
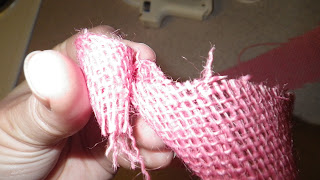
Take your fabric and twist it, it doesn't matter which way you twist it, but I twisted away from me rather than towards me.
Tack with glue.Twist and tack.


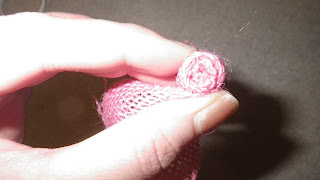
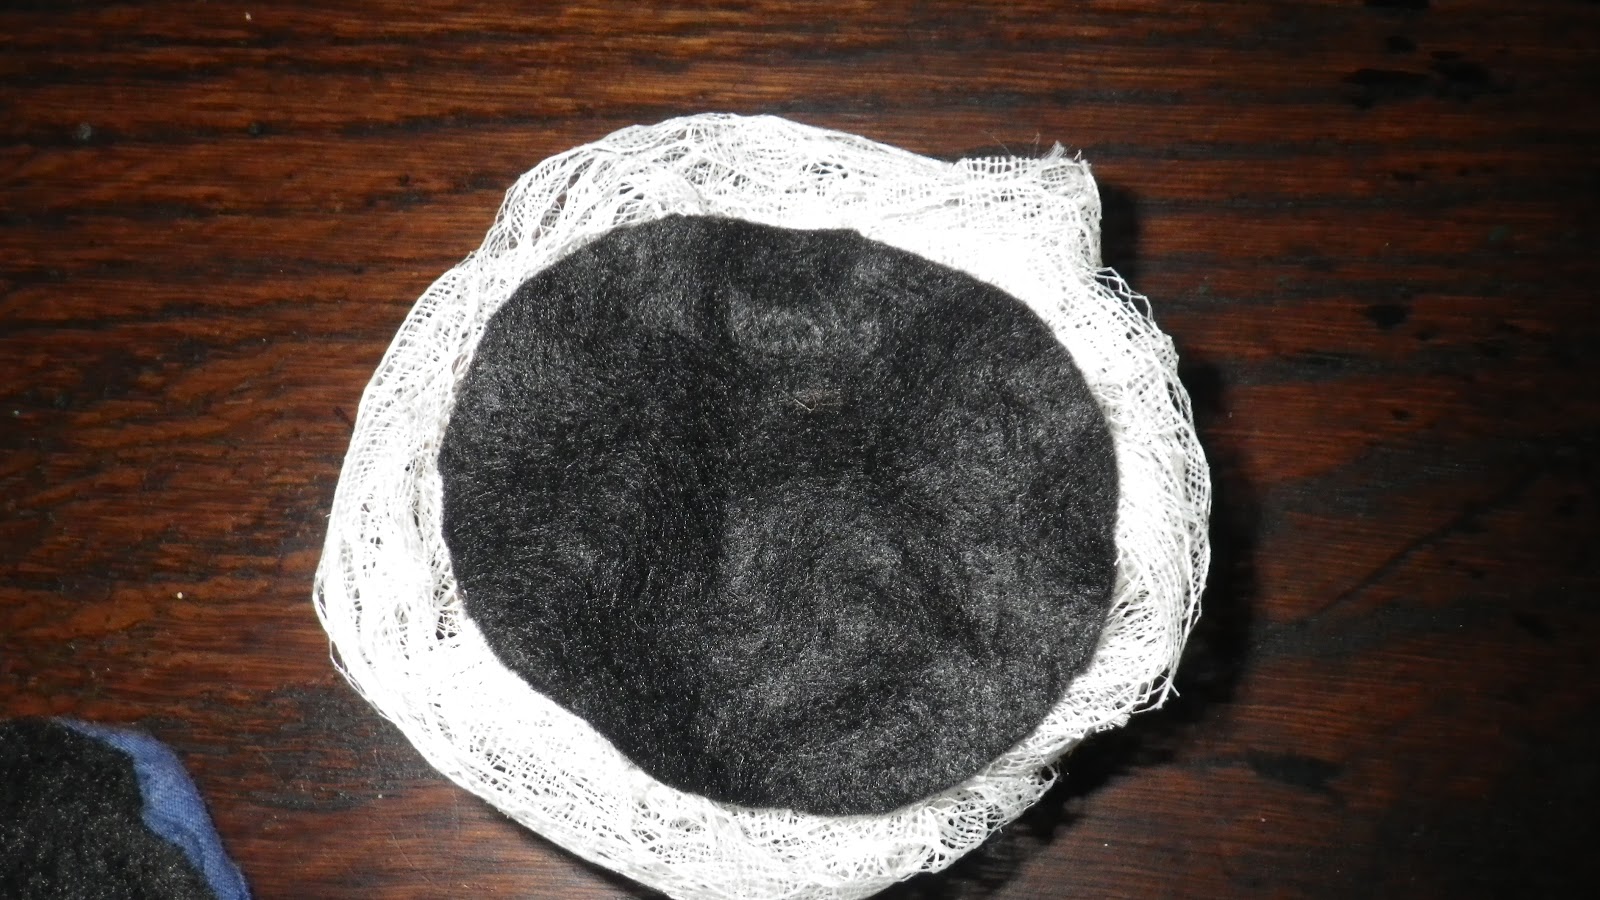
 Another option is to start with the felt and glue the flower on as you go. Once complete, you can just trim the excess. I found this method easiest when making a large rosette.
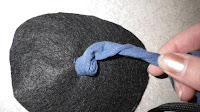
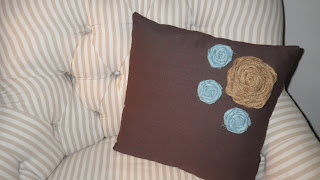
P.S.- the blue rosette above was made with a strip of a t-shirt. Adam doesn't know it yet, but one of his shirts will now be baring his midriff. I kid, I kid.

I will warn you, once you make one you will be addicted. They are just too easy and pretty! And cheap! Plus, there is so much you can do with them.
Materials:
Choice of fabric
Choice of glue-- I used hot glue (even though we don't get along)
Felt (optional)
Get your fabric and cut a strip 1 inch wide by 24 inches long. After you make one you can adjust the length and width of fabric to your liking. Most of my strips are about 27 inches-ish. I say ish because I don't really measure things. No self respecting lazy crafter does! In the pictures I am using some pink burlap I bought at Hobby Lobby with a 40% off coupon (Woohoo!).

Fold the end of your strip in half and then fold it in half again.


Roll the end into the fabric a few times.

Tack it down with a spot of glue.

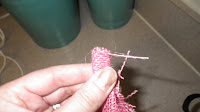
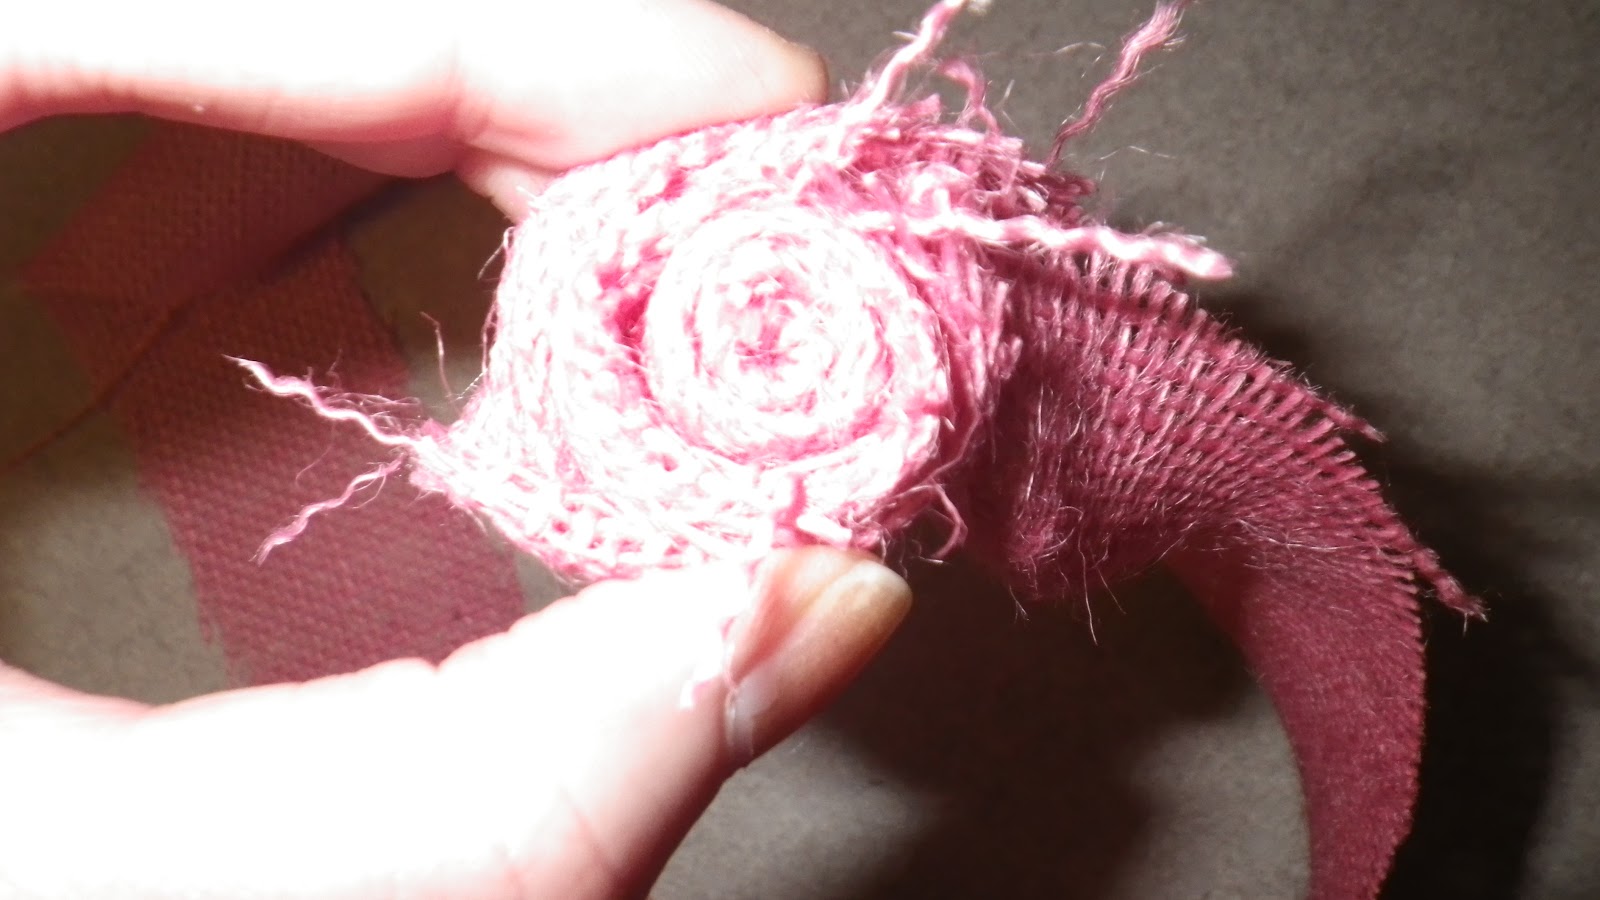
Take your fabric and twist it, it doesn't matter which way you twist it, but I twisted away from me rather than towards me.
 |
| See how the fabric is twisted back instead of towards the front? Either way works. |

Twist and tack as needed.
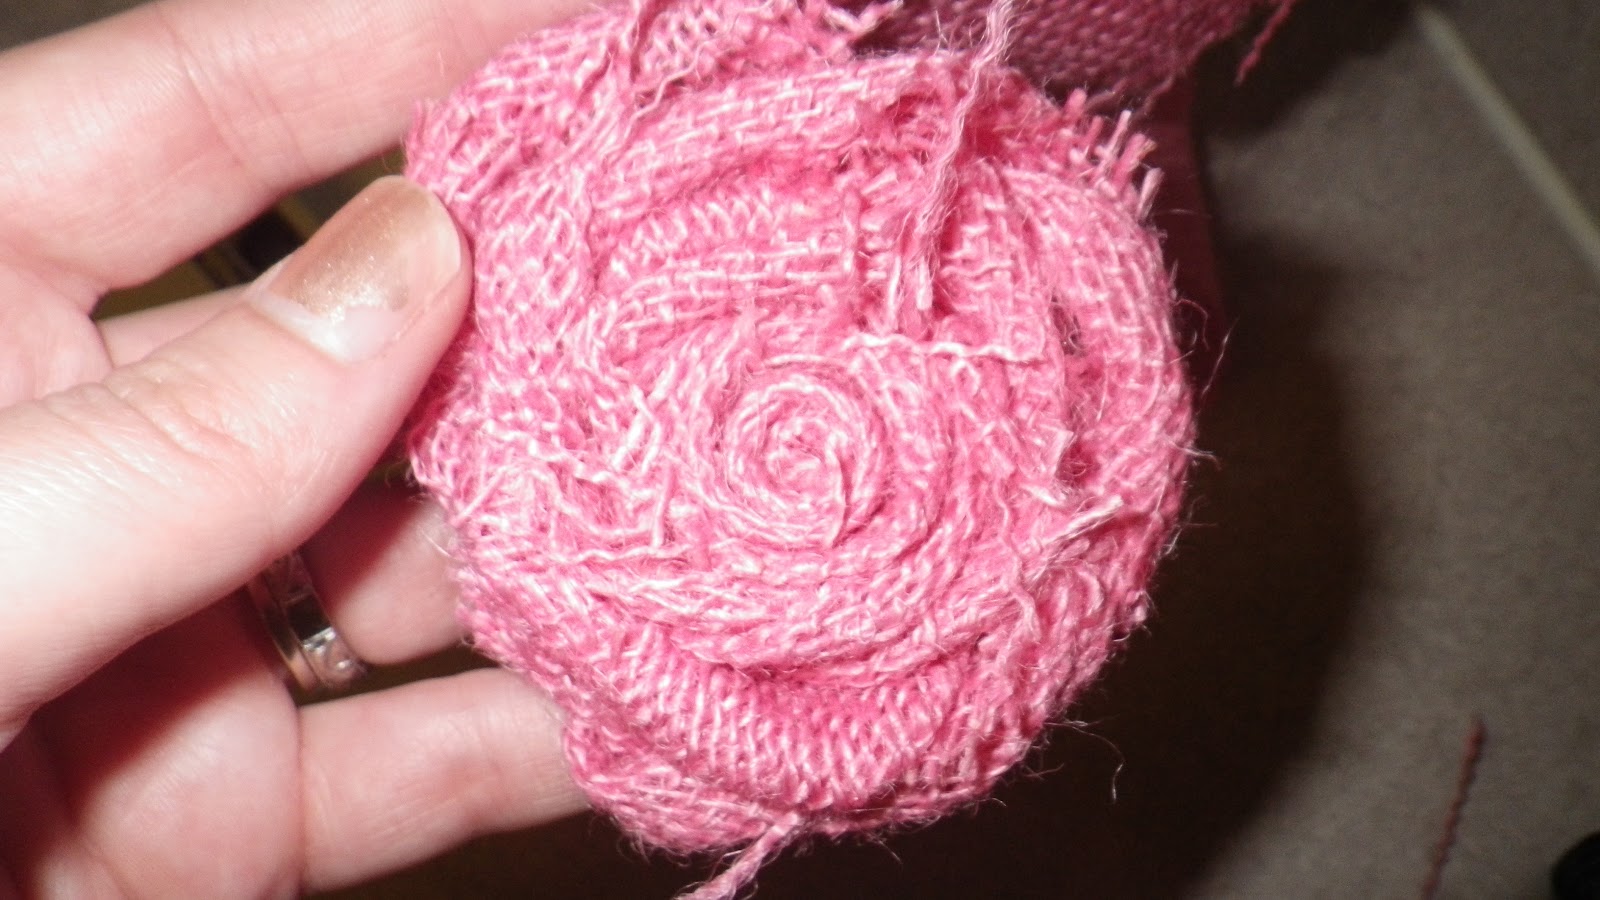
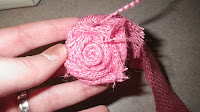
When you get to your desired size, flip it over and glue the tail of the fabric onto the back.
 |
| You can't tell, but this is the back and there is a glob of glue. I just folded the extra over and mushed (technical term alert). Then I trimmed the excess. |
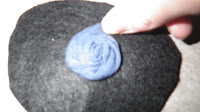
They are that easy! If you want a nice backing, get some felt and cut a circle and then hot glue to the back. Like this:


 |
| Methinks I cut too much felt. |
OK, so I made one.
Then I made two.
Then things got a little crazy up in here.
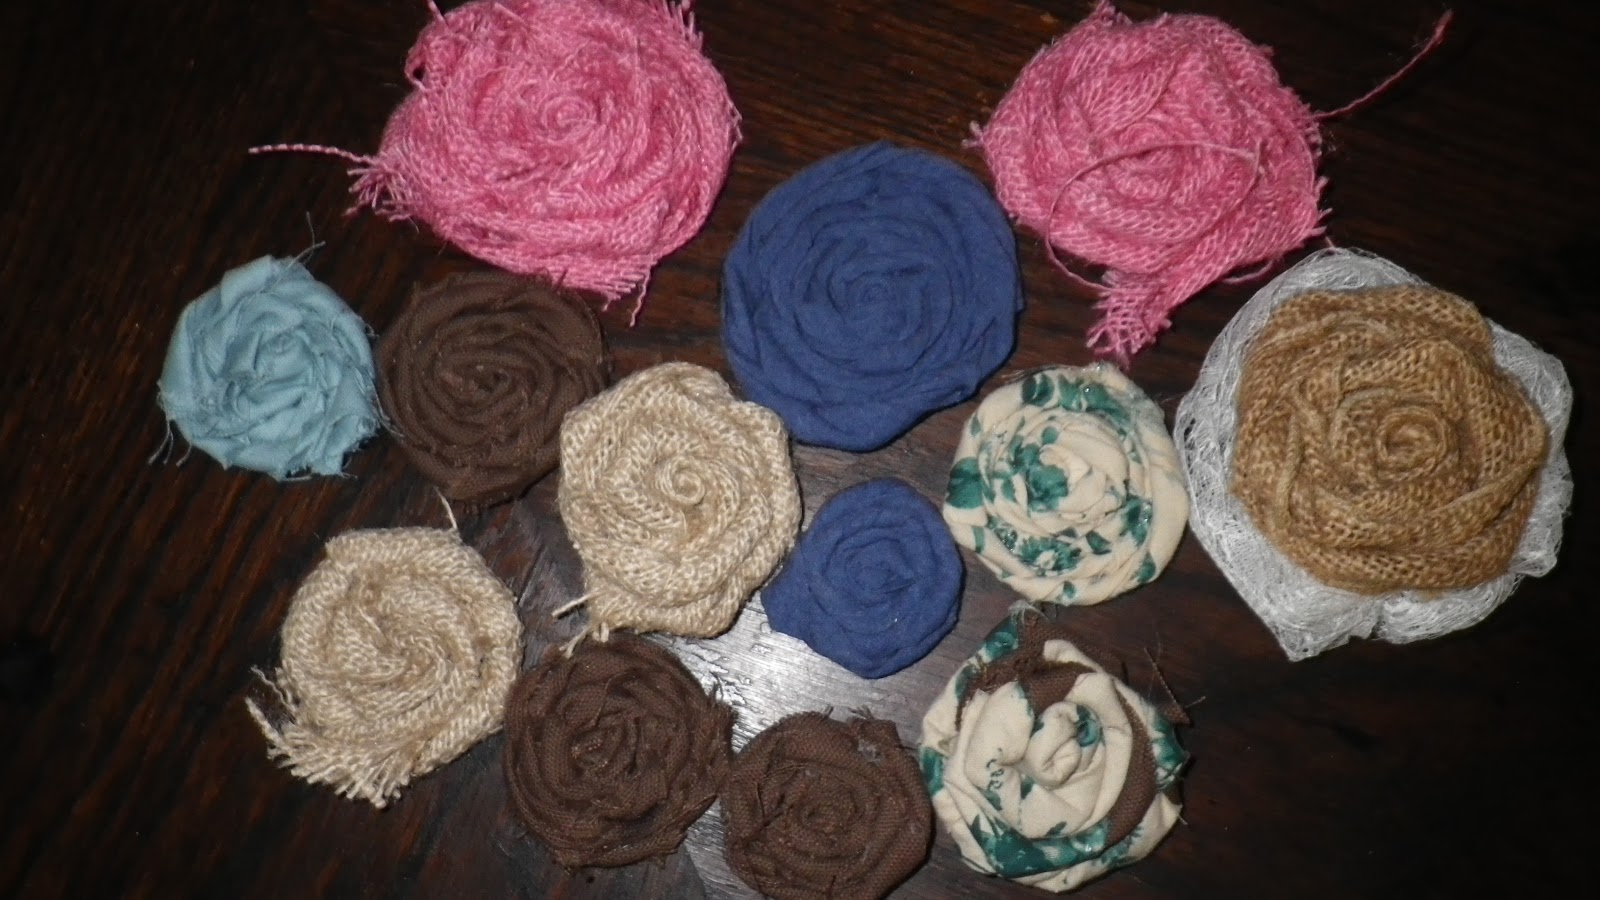


 |
| I have already sold this puppy on Etsy! |
I added several rosettes to some pillow covers. Want my fool proof method of making pillow covers? A step by step guide:
Get in your car.
Drive to McDonalds and get a large Dr.Pepper with extra ice. Sip and enjoy the bubbly goodness.
Drive to Hobby Lobby.
Find the curtain/pillow cover aisle (near the fabric).
Choose a pillow cover.
Purchase at will.
OK, so I didn't exactly make the pillow covers, but I did get them when they happened to be on sale for half off, which unfortunately the cashier told me never happened. The brown cover was 2.50 on sale, and the chevron print was 3.50. But even if you can't catch them half off, you can always buy one with a 40% off coupon. I think they are super cute!
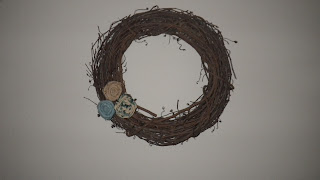
So easy and cheap! You could add these to a wreath (as I did above). Or you could attach a few to a lamp shade. Or you could glue or sew one on a headband. Or you could put one on a pin and wear. Or you could make a necklace. Or you could make a bracelet. Did I mention I went a little crazy? Until next time!
Stay crafty, my friends.
Tuesday, January 29, 2013
Glitter: The gift that keeps on giving!
The original title of this post was "Glitter is the Herpes of crafts," but I figured that might be offensive. So I moved it to the first line in the post. Much less offensive. I read that quote somewhere and thought it was hilarious. And true. I love glitter. Love crafting with it. Love glitter decorations. But once you have glittered, it seems you never get rid of the tiny sparkles. And It.Gets. Everywhere. There is glitter on the tables, glitter in your hair, glitter on your skin and clothes. But then, I think that life is better when it is sparkly. So sparkle on!
Today's Thrills Thrifty Craft involves glitter and clothespins and Mod Podge.

That's It! And you get some cute clothespins to use for anything you need. I put a layer of Mod Podge on the clothespin, poured the glitter over the clothespin (while holding it over a bowl to collect the extra) then set aside to let dry. Once dry, I used a paint brush to put a layer of Mod Podge on top of the glitter and let dry. The top layer of Mod Podge really sets the glitter so that it isn't sprinkling everywhere.

I think the clothespins were a dollar for 25 or 50 at walmart. I already had Mod Podge and glitter.
I really love using them and they really sparkle! I made some pink ones for a baby shower and used them to hang letters on twine for a banner.
I made some red ones and hung our Christmas cards on some twine as a cute and easy display. You could glue a small magnet on the back for even MORE functionality. I still plan on posting about rosettes this week, so come back!
Stay crafty, my friends!
Friday, January 25, 2013
Talkin' Chalk
Chalkboards, that is. I am sort of obsessed with chalkboards and chalkboard paint. I wanted to share some of the chalkboards I have made recently. They are sooooo easy! You should make one, too! Or, you could become like me and be so obsessed that you make 10 and then have no place for them! On second thought, don't be like me.
Many moons ago, I was bored on a Saturday and decided I wanted to get out and go to some garage sales. I was very unfamiliar with the area and I ended up getting lost. I made some turns, and then some more turns, and then a few more turns and I stumbled upon a neighborhood wide garage sale. I have seldom before or since had such a successful garage sale day. It was epic. It was magical. I get a little misty-eyed when I think about it. I only made a few stops before I had a full car and an empty wallet. I refer to it as the Bermuda Triangle of garage sale neighborhoods because I found it by accident and I haven't been able to find it since! When I left the last sale, I turned a corner and it's like it vanished from the face of the earth, never to be seen again. Sort of like the lost city of Atlantis, if Atlantis was a cool bohemian neighborhood full of hippies and TCU students.
It was at one of these garage sales that I bought a big wooden tray. I had been hankerin' to make a chalkboard for some time and when I saw this little beauty out of the corner of my eye I knew, KNEW, I had to have it. It was my last stop of the day and I literally had 3 dollars. This is when going to garage sales late comes in handy. The late hour, combined with the Texas heat were wearing on the sweet people hosting the sale and they let me purchase the tray and a mirror for much much less than they had them priced. God bless them. OK- so here is a pic of the tray before and after:
The second chalkboard I made from a piece of sheet metal that I got from a different yard sale for 1 dollar. It already had holes for hanging! Sorry but I don't have a before picture. With both the wooden tray and the metal, I spray painted the surface with Krylon paint in Watermelon Gloss. With the metal, I used a primer prior to the first coat of spray paint. I wish I could say that I taped off the part that was going to be my chalkboard surface to ensure a perfect paint job, but I did not. I just bought some chalkboard paint from Hobby Lobby with a 40% off coupon (Woohoo!) and followed the directions. When I got to the edges I just painted reeeeeaaaaallllyyy carefully.
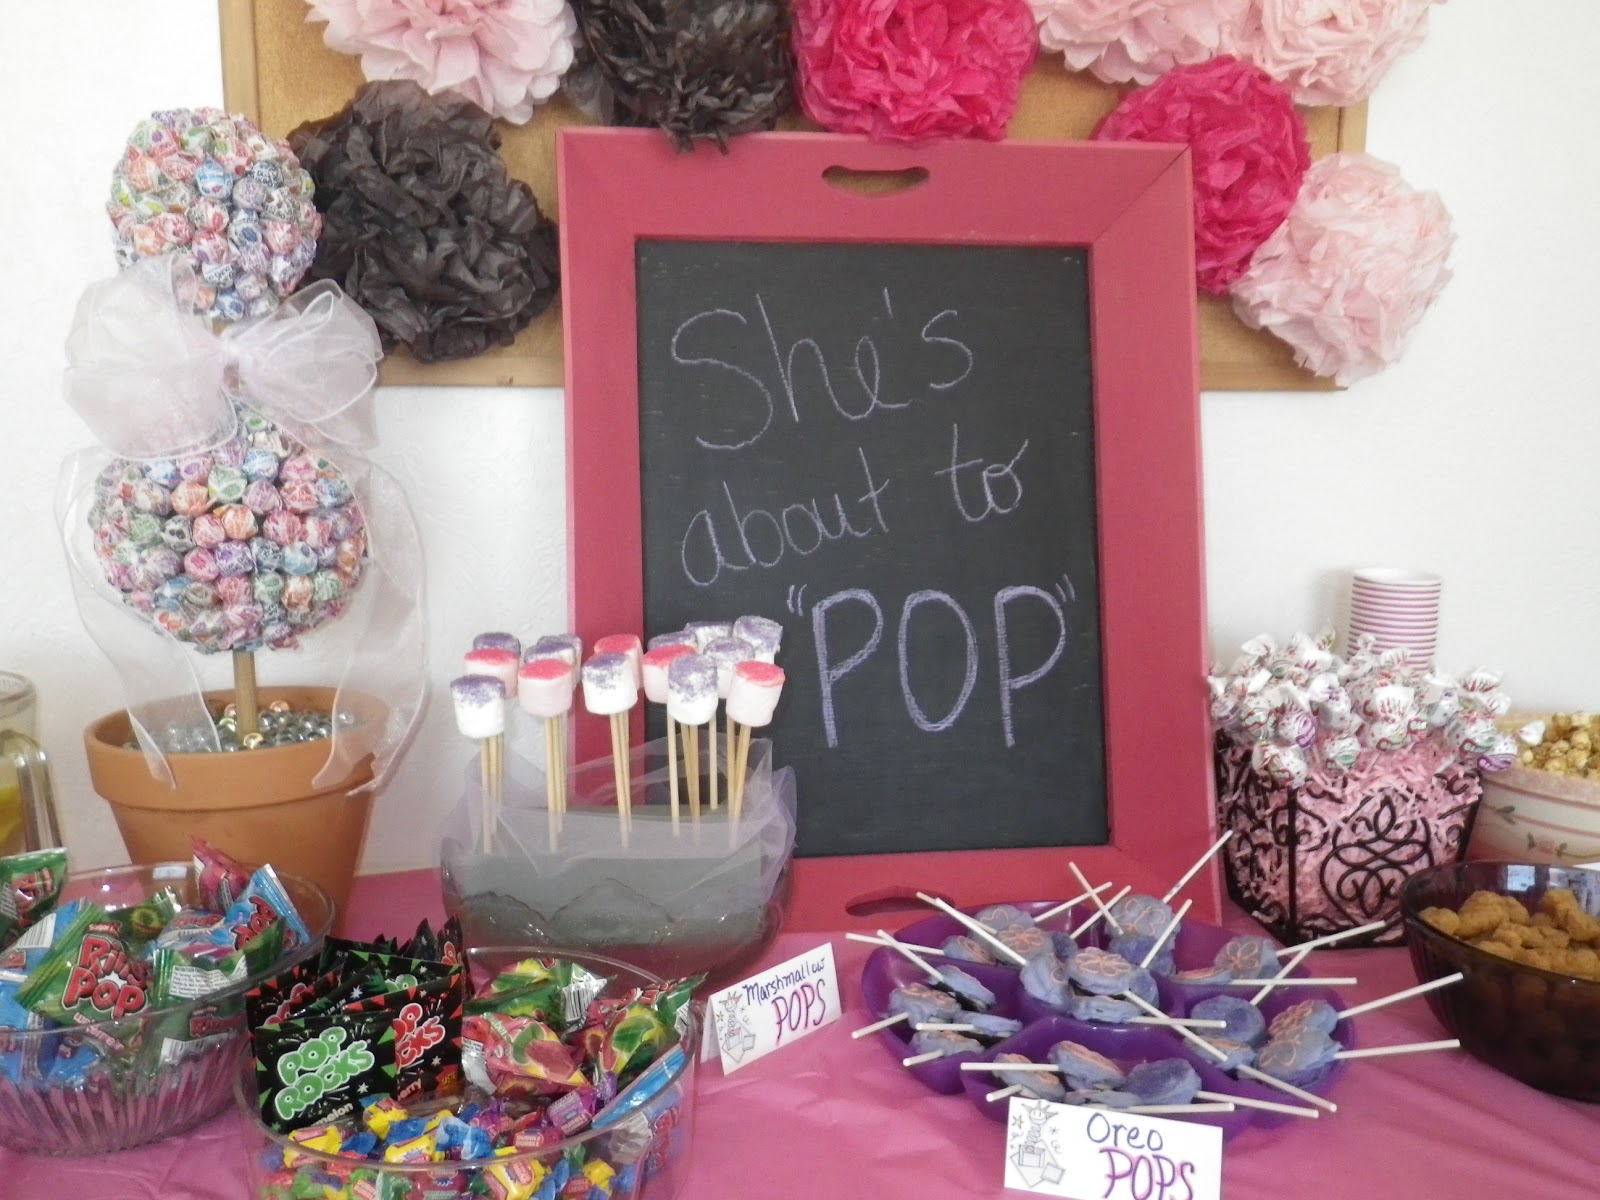
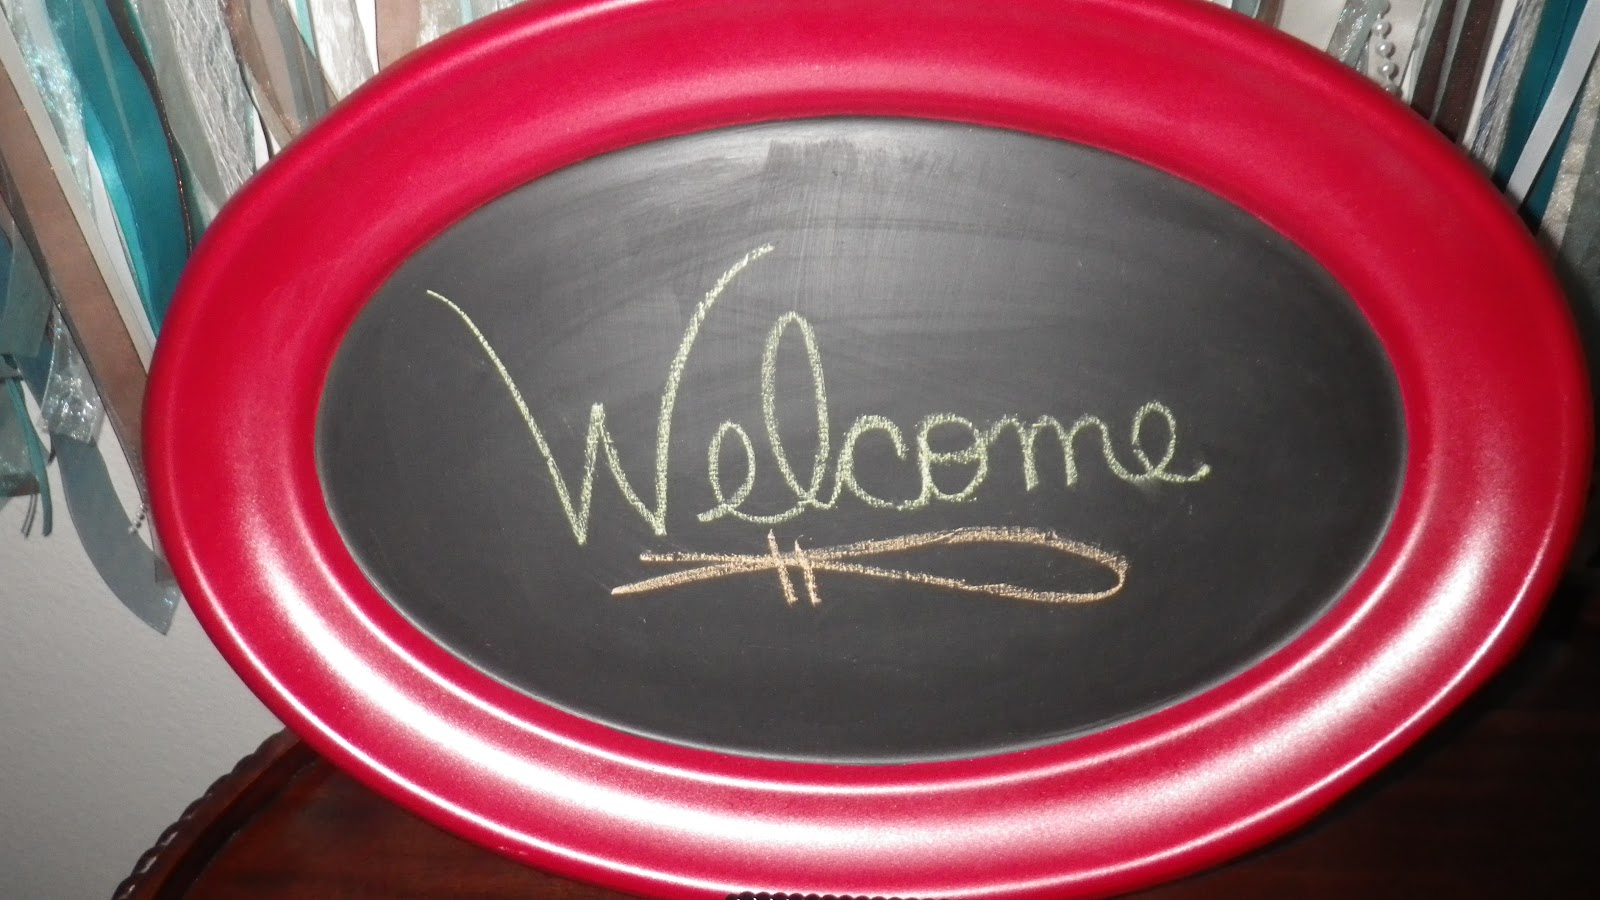
The last chalkboard project that I made recently involved two heavy-duty metal trays that I bought at a.... well, you know where I bought them. They were $1.50 each. I primed them with primer, which is a very important step when spray painting on metal. It helps the paint adhere and not scratch off so easily. You can get a spray paint primer at Wally World or Lowe's. I used Rustoleum Flat Primer. After priming, I spray painted them with Krylon paint in Cherry Gloss. I then used my chalkboard craft paint and painted the inside of the tray. I gave one to my sister-in-law for Christmas(she asked for one specifically, I wasn't being cheap I promise) and I kept one. I like these because of their size, which allow them to be placed almost anywhere and their cheery color!

Many moons ago, I was bored on a Saturday and decided I wanted to get out and go to some garage sales. I was very unfamiliar with the area and I ended up getting lost. I made some turns, and then some more turns, and then a few more turns and I stumbled upon a neighborhood wide garage sale. I have seldom before or since had such a successful garage sale day. It was epic. It was magical. I get a little misty-eyed when I think about it. I only made a few stops before I had a full car and an empty wallet. I refer to it as the Bermuda Triangle of garage sale neighborhoods because I found it by accident and I haven't been able to find it since! When I left the last sale, I turned a corner and it's like it vanished from the face of the earth, never to be seen again. Sort of like the lost city of Atlantis, if Atlantis was a cool bohemian neighborhood full of hippies and TCU students.
It was at one of these garage sales that I bought a big wooden tray. I had been hankerin' to make a chalkboard for some time and when I saw this little beauty out of the corner of my eye I knew, KNEW, I had to have it. It was my last stop of the day and I literally had 3 dollars. This is when going to garage sales late comes in handy. The late hour, combined with the Texas heat were wearing on the sweet people hosting the sale and they let me purchase the tray and a mirror for much much less than they had them priced. God bless them. OK- so here is a pic of the tray before and after:
 |
| Before
|
 |
| After Used as a sign at the baby shower I co-hosted for my sister-in-law. |
 |
| Made from sheet metal. |
The last chalkboard project that I made recently involved two heavy-duty metal trays that I bought at a.... well, you know where I bought them. They were $1.50 each. I primed them with primer, which is a very important step when spray painting on metal. It helps the paint adhere and not scratch off so easily. You can get a spray paint primer at Wally World or Lowe's. I used Rustoleum Flat Primer. After priming, I spray painted them with Krylon paint in Cherry Gloss. I then used my chalkboard craft paint and painted the inside of the tray. I gave one to my sister-in-law for Christmas(she asked for one specifically, I wasn't being cheap I promise) and I kept one. I like these because of their size, which allow them to be placed almost anywhere and their cheery color!
Thanks for stopping by! Next week I plan on posting about some easy peasy fabric rosettes. Stay crafty, my friends!
Wednesday, January 23, 2013
Thrill's Thrifty Craft: Valentine's Day Craft
Ah, Valentine's Day. How I love thee. And I do really love Valentine's Day. I have ever since I was a little girl sitting in class diligently decorating a shoe box that would later collect class Valentines. I remember on one particular Valentine's Day, it was a few hours before our class party and I was feeling extra special because mom sent a fruit roll up in my lunch that day. Score! I saved it for last and ate it right before lunch ended. As I walked back to class, there was a pep in my step and I was so excited as I thought of the party that was to come. But, as I walked, I felt a little rumbly in my tumbly and I started to feel a little queasy. By the time I got to class I had that feeling. You know the one. The feeling that says you are about to upchuck. But, my teacher was nowhere to be found. Being the strict rule follower I was, I was afraid to leave class without permission. So I stood in the doorway, my eyes searching the small hallway for my teacher while simultaneously taking small breaths and trying not to ralph in front of the entire class. When she finally arrived I said "Miss Chris, I think I'm gonna be...." And then I ralphed in front of the entire class! I ended up going home. I still remember trying to talk my mom into letting me stay at school. But, alas, she brought me home where I sat by a trash can and mourned the fact that I was missing the party and the chance to get hopped up on sugar and run around like a crazy person with my friends. I didn't eat another fruit roll up for years.
I kind of forgot why I was telling you that story. Oh, well.
So, as I was saying, I LOVE VALENTINE'S DAY! I love all the red and pink displays, the chocolate, I love the little frilly paper doilies, the chocolate, the cheesy little cards that kids pass to one another, the chocolate, dumb romantic movies, the chocolate... MMM CHOCOLATE.....
Sorry, I got a little sidetracked. Back to crafty goodness. As promised on my last post, a Valentine's Day craft!
It is cute and very simple. This craft can be done with materials you have around the house. You will need:

Wax Paper
Crayons-- I used cheapo ones from Walmart
Big pencil sharpener or crayon sharpener-- Again, I got one for a dollar at Walmart ** You could also use a cheese grater
Iron
Craft Paper or paper towels- to protect the surface and the iron.
I first got the idea from Martha Stewart's website. You can check it out, here. I followed the tutorial and everything came out perfect! I will say that the crayons kept breaking off into the sharpener and so I had to use something to dig out the small broken pieces. Other than that, easy peasy.
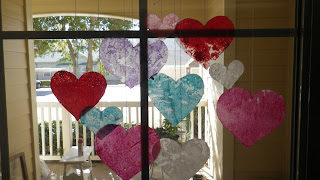
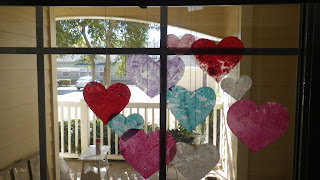
I made these about 3 years ago and I have pulled them out as a part of my Valentine's day decor ever since. They look great in the window because they are sort of translucent.
I used string to hang them, but I think ribbon (thin) would be pretty. I didn't hang mine from a dowel rod, as suggested. I hang them individually (usually from the ceiling with tacks) and store them in a large envelope the rest of the year.
I kind of forgot why I was telling you that story. Oh, well.
So, as I was saying, I LOVE VALENTINE'S DAY! I love all the red and pink displays, the chocolate, I love the little frilly paper doilies, the chocolate, the cheesy little cards that kids pass to one another, the chocolate, dumb romantic movies, the chocolate... MMM CHOCOLATE.....
Sorry, I got a little sidetracked. Back to crafty goodness. As promised on my last post, a Valentine's Day craft!

It is cute and very simple. This craft can be done with materials you have around the house. You will need:

Wax Paper
Crayons-- I used cheapo ones from Walmart
Big pencil sharpener or crayon sharpener-- Again, I got one for a dollar at Walmart ** You could also use a cheese grater
Iron
Craft Paper or paper towels- to protect the surface and the iron.
I first got the idea from Martha Stewart's website. You can check it out, here. I followed the tutorial and everything came out perfect! I will say that the crayons kept breaking off into the sharpener and so I had to use something to dig out the small broken pieces. Other than that, easy peasy.
I made these about 3 years ago and I have pulled them out as a part of my Valentine's day decor ever since. They look great in the window because they are sort of translucent.

Here is what they look like in the window- pay no attention to the mess on the patio!
I used string to hang them, but I think ribbon (thin) would be pretty. I didn't hang mine from a dowel rod, as suggested. I hang them individually (usually from the ceiling with tacks) and store them in a large envelope the rest of the year.
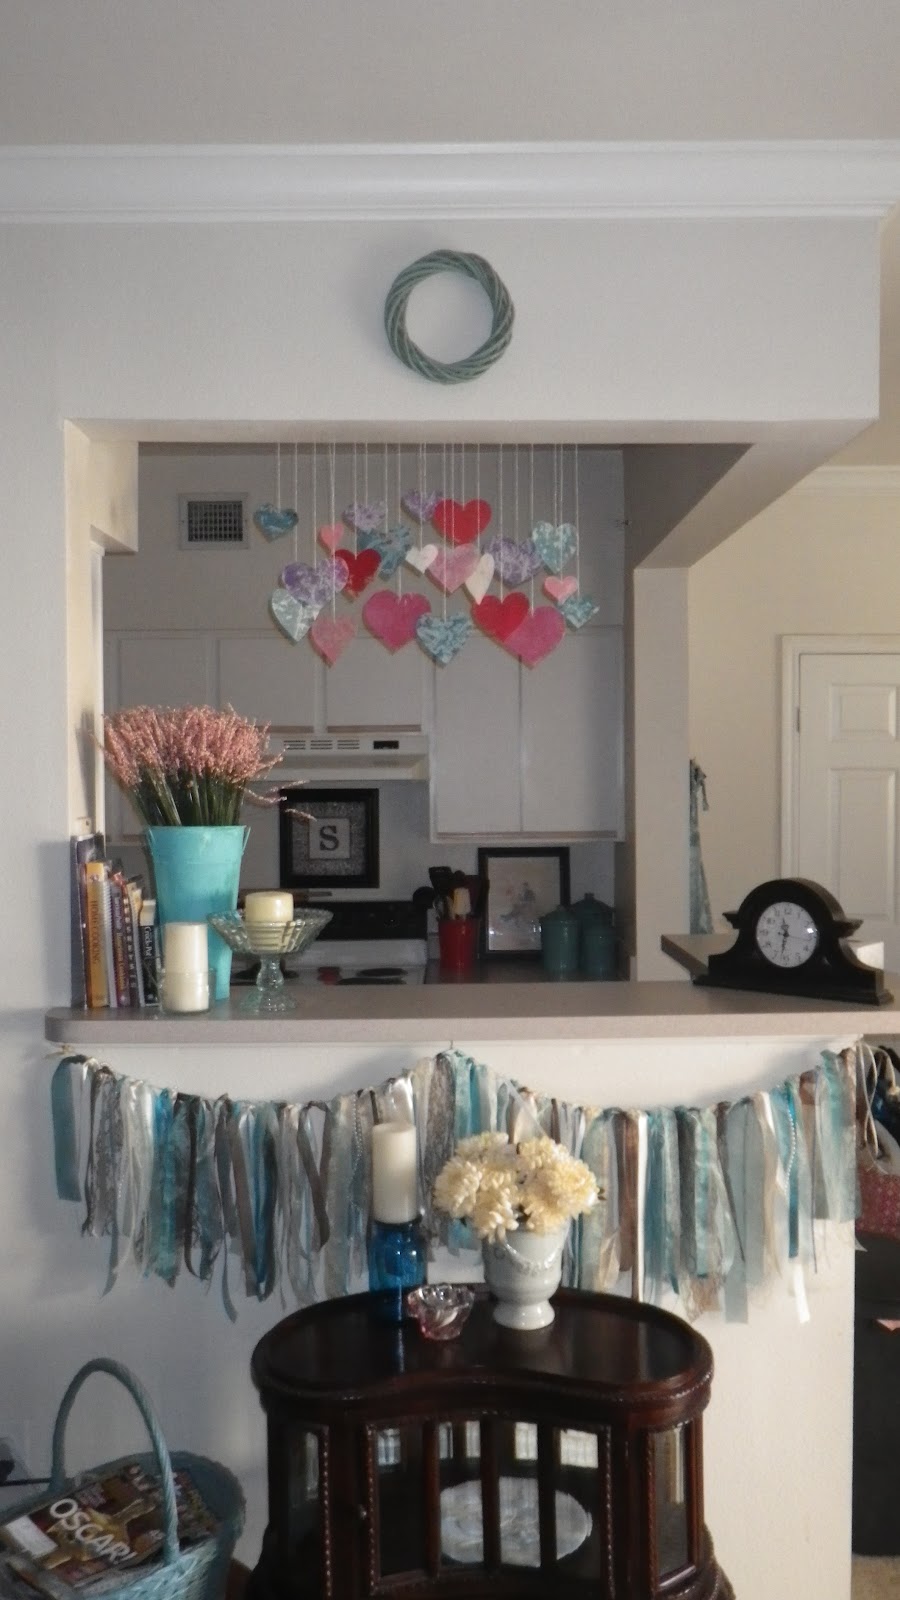
This is where I have them hanging now.
Just a little touch of Valentine's Day!
There you have it, folks. A cheap and easy craft. I plan on posting one more craft this week, so come on back! Stay crafty, my friends!
Subscribe to:
Posts (Atom)